Author: admin


One of my favourite things to do on the job is when I get to take something old and outdated and reinvent it all new and awesome.


In October, I got to do exactly that to a 50-year-old sandstone fireplace.


Not only did I lower the height of the fireplace by a whole eight inches, but I also created baffles for the Heatilator’s vents.


The plaster I thought best for this job was Tadelakt, but I got tricky and added Mother-of-Pearl to make the finish a one-of-a-kind fireplace.


I hope you enjoy checking out the pictures.


The Fireplace Before

We have had an amazing summer at Decorative Painting & Plastering Concepts and the fall is just beginning!!!! First off I must thank my clients for challenging me on their projects and giving me the opportunity to work with them. We spent a lot of time this spring marketing and teaching our clients about the benefits of Green and low V.O.C. materials not only has it been better for us and the environment but the advancements that companies like Benjamin Moore & Stucco Italiano have made make it possible for me as an applicator to provide the best quality materials and customer service knowing that they will hold up for years to come.

We have had an amazing summer at Decorative Painting & Plastering Concepts and the fall is just beginning!!!! First off I must thank my clients for challenging me on their projects and giving me the opportunity to work with them. We spent a lot of time this spring marketing and teaching our clients about the benefits of Green and low V.O.C. materials not only has it been better for us and the environment but the advancements that companies like Benjamin Moore & Stucco Italiano have made make it possible for me as an applicator to provide the best quality materials and customer service knowing that they will hold up for years to come.

This is a photo of one of our recent full interior paint project in downtown Vancouver, it also included a custom metallic paint finish in the master bedroom and a custom Tadelakt pillar to match their existing Solus Stone Fireplace.

For this project the main goal was to repair the ceilings. There had been some major cracks cutting through in a straight line for sometime in this home after a major renovation. Now I know most people dread the thought of having to work above their head especially doing a Lime plaster finish. For me though its just another day at the office. I love ceilings, they have a feeling of a challenge like hiking a mountain or running in a marathon. You see when you start any venetian plaster finish their is no stopping you must complete the task. So if I am distressing a 300 square foot ceiling I have to complete it in that day. The beauty of this project was the creativity, I was able to come up with ideas like the rosettes, which added a great deal of architectural detail. I hope you enjoy the video.

Cheer’s

Darrell Morrison

If you would like to see the video in High Definition click this link
http://www.youtube.com/user/MorrisonDarrell

Welcome to my news letter. Inside you will find detailed information of my recent projects and favorite finishes. You can view it here

The features in this issue include

1. “Uniquely Daring” a subtle carrara marmorino feature wall

2. “Inspirational Thoughts” for you or your clients design ideas

3. Featured project “Diplomatic Immunity Clothing Inc. On South Granville, A classic white venetian plaster with a twist.

4. “The Grand Entrance” a full interior paint project in Tsawwassen including lots of wood finishing and wood graining a lost art.

Leave a comment and let me know what you think??

The cabinetry was built by Stirling Woodworks Ltd.

Gilding has been used traditionally for picture frames

Interested in learning how to do it your self here is some use full info

here is a silver leaf chair made by http://www.btcinternational.it/index.aspx

This video briefly talks about sealing a lime plaster in a kitchen to prevent water and oil stains. The photos below show the look of the Venetian plaster after the sealer has dried.

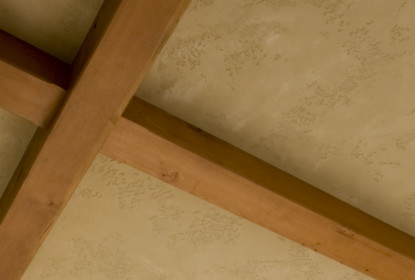
Today I finished the texture coat of the master bedroom ceiling inlay. At this point the finish looks very stark and incomplete most people on the project mentioned there dislike to the colours chosen, i sent them back into the room after completion of the glazing and waxing layer they all liked the final product.

I have completed the kitchen plaster and have started on the finish coats for the painting as we wait for stain samples for the beams.. i will post more photos soon…….

This past Thursday I got approval of my sample, I have focused on the kitchen ceiling so they can start laying the flooring and installing the cabinets. I still need to stain and finish the beams in the great room that we sanded last month, in due time once the client picks the colour. The plaster will also get a glaze once i have sealed it…….. more photos to come soon


Contact

Office:: 604.628.7855 | Direct:: 604.779.4233 | 9am to 5pm Monday – Saturday

Name
Email
Message

Thank you! Message sent.
Error! Please re-check that all fields are complete.
©Copyright 2019 Decorative Paint & Plaster Concepts Inc.