Category: Bathrooms

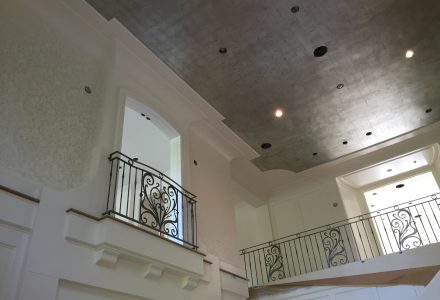
We recently finished this detailed interior using venetian plaster in this beautiful traditional home, infused with tuscan details. The owners wanted a house built using environmentally safe products, however they were not aiming for LEED points. We used low voc colorants designed for this project and soap wax’s for sealing all the surfaces. Venetian plaster is a great alternative to paint materials as its surface does not show ware easily and its depth and beauty spark conversation. All the ceilings throughout the project were finished with a 2 tone Tadelakt lime plaster. The base boards, crown mouldings and stair kicks are finished in a pitted plaster finish to give the look of solid stone. I hope you enjoy viewing this project just as much as we enjoyed helping create it.

Continue Reading..

If you know me, you know I’m a busy guy. It’s work, work, work, these days, and when it’s not about work, it’s about time with my wife, my girl, and the pups.

Needless to say, like most of us, I seldom get to do the projects around the home that I dream of doing.

That all changed in the last month, because not only did I finally get to do a bit of home reno that my family gets to enjoy, but I also got to try something I’ve wanted to do for a really long time — a heavy-duty Italian venetian plaster treatment to a bathroom shower stall.

This work was done in our main-floor bathroom, which had been wanting TLC for a while.

Doing any project for the first time, especially when it’s a bathroom, can make it hard to estimate all the work involved, so getting a chance to explore the process on my own time was great.

It was a major project by the time I finished, as you can tell by the end results, but what did it take to get there?

Here’s how the Home Shower Venetian Plaster Project evolved, start to finish.

This ’70s bathroom came with tons of cedar, which all had to come down. Luckily, it was installed by someone who didn’t make much effort to do it right, so only a couple nails in each board ensured they popped right off. Removing the shoddy work made investing time in improving the room that much more satisfying.

The first thing I wanted to do was move the shower-head up by about two feet. No one wants to crouch for a shower.

Before now, I never had the need, or an opportunity, to work with copper. I decided I’d take a kick at the copper can instead of calling a plumber, and working with the pipes was easier than I expected. I might do the odd fix-it job here and there now, but I’d certainly never do my whole place.

Next, I installed plywood. I’m sure some of you building guys out there are wondering “why not concrete board instead of plywood?”

It’s a preference, really. I find plywood’s just easier to work with, and it comes in big old 4×8-foot sheets, making for less cutting in some situations, but, most importantly, I find plywood’s a big help when it comes to installing lath. (Shown later.)

Next up was installing the water-proof membrane. Obviously a quality project is needed for a shower, and I used a local company’s product, called, “SuperSeal” you can learn more about it here.

Continue Reading..


Guess what I’ve always dreamed of scratching off my bucket-list? Plastering a high-end commercial building.

Soon, I’ll be scratching it off! (Or I can change the bucket list to “super-big high-end commercial building,” maybe. Then, after that, add “downtown”.)

Starting April, 2011, I’ll be starting an amazing adventure with my team as we begin a massive lime plastering project in the Grandview Business Centre in South Surrey, BC.

It’s a great building, an important part of the new “Morgan Crossing” district, which is an area that has just exploded over the last two years.

The mall, The Shops At Morgan Crossing, has great businesses like the Steve Nash Sports Club and a favourite of mine, because we all love a good wine: the “Everything Wine Store”.

Located so close to the mall, the Business Centre’s a great location for professionals looking to be accessible and convenient for clients.

All right, let’s talk project details.

The Builder Double V Construction will be creating the blank canvas for this amazing project.

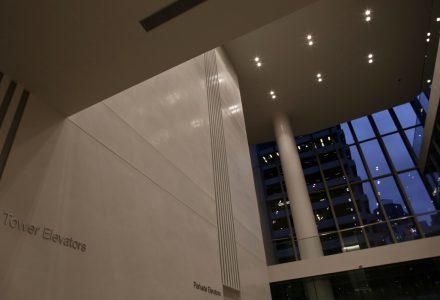
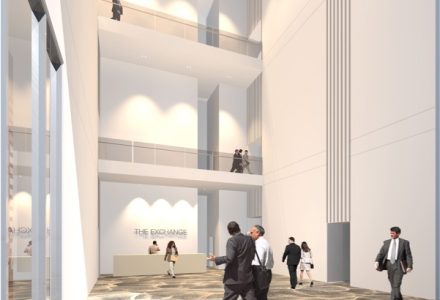
We’ll be putting lime plaster in all the common spaces (including lobbies, corridors, and washrooms) on the Morgan Crossing Business Centre’s 1st, 3rd, and 4th floors.

We’ve chosen the palette already.

The corridors will be a slightly polished sandy/cream-coloured lime plaster with subtle pitting and black flecks.

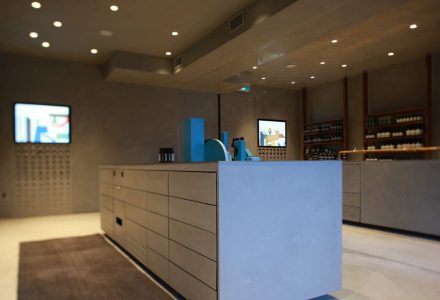
Washrooms will be treated with a cement-based plaster that incorporates subtle pitting, almost like a honed travertine, but seamless and free of any joints.

The lobby ceiling will have a shiny finish that resembles the look of polished marble.

I can’t wait to see so much of my work in one place. A lot of what I work on is in private homes, but this will be a project that I can “visit” for years to come — and close to home, too.

Stay tuned while I prepare for this awesome undertaking, because I plan to share the journey with you by blogging the process in words and video while things come to life.

Cheers,

Darrell Morrison

Recently, I finally got the tool I’ve been wanting to add to my company’s arsenal — a 12-colour carousel tinting machine.

You’re likely saying “A what?”

When I Say “Any Colour”, I mean It More Than Ever

For years, I’ve been creating custom colours. Many times, I’ve been unsuccessful because of technicalities, like not having proper colours available to me or a way to distribute them evenly or quickly among all the products I needed to mix to get the job done and done well.

Stuck working with these technicalities, a lot of my colours were found in one part of the colour spectrum — browns or tans, and even beiges now and then.

With the size of new lime-plaster interior projects and the new direction I’d like to take my Venetian plaster work in, I knew the time was right to get this tool that would make the difference in meeting my standards on a large scale.

As an example, I’m currently working on a 10,000 square-foot Intonachino lime-plaster interior. With so much surface to cover, the client is having a hard time choosing the perfect colour. We’re close, so they now only want slight shifts in shade and/or hue. (How are “shade” and “hue” different? Learn more by following this link.)

Picky? Not at all. Like me, they know job satisfaction is all about the details.

I’ve now taken great care to create 20 different colours for this project. That’s a bit of an extreme for any project, maybe, but you have to live with the colour long after I’m gone, and we need to get it right. I won’t get upset or rush you for a colour at the beginning of a project, because preparation and work can begin while we take the time to do the right things to help you come to a decision you literally can live with.

This tint machine makes my life easier and helps me live up to my dedication to getting you a a truly livable colour for your environment. Now, at any point in time, I can change a colour’s direction. You want a 25% lighter shade? Okay, not a problem. We don’t need a paint-shop pro or a chemist to guess it out. Let’s get that done ourselves — between you and me, and save ourselves a lot of headache and reduce wasted materials in the process.

Breaking It Down:

◦                                  Whatever your favourite material — Tadelakt, Intonachino, Carrara or Classic — I have full control over the colour and tint of the end-product.

◦                                  Your money gets saved because I’m not wasting materials or gambling on a factory’s ability to get those pallets of lime plaster tinted just the right way.

You want it lighter? Darker? I can change that on a dime now, so you get what you want when you want it. Hue by hue, shade by shade, we’ll nail the colour of your dreams.

Over the past week, I had the opportunity to work on the new Bosa building in White Rock, BC, with one of my favourite designers — a big fan of my style of Venetian Plaster. She’s always pushing me to try new things and stretch my creativity, so it’s a great working experience to be around her.


When meeting a new client and designer, the most important part of the meeting is being able to absorb their ideas and use that as inspiration for creating a unique design that’ll reflect the best of everything they want.


I think I pulled that off, and it’s even reflected in the materials we used.


For this project, I used Carrara Marmorino. It’s different because of its small granules, which allows it to polish to a beautiful satin finish. For added durability and a beautiful finish, I sealed the surface with natural beeswax.

Contact

Office:: 604.628.7855 | Direct:: 604.779.4233 | 9am to 5pm Monday – Saturday

Name
Email
Message

Thank you! Message sent.
Error! Please re-check that all fields are complete.
©Copyright 2019 Decorative Paint & Plaster Concepts Inc.