Category: Tadelakt

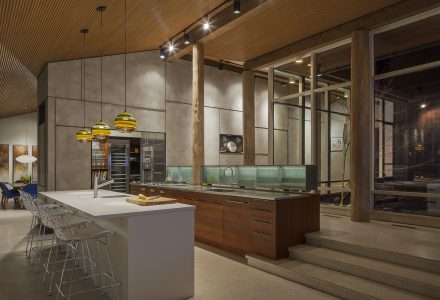
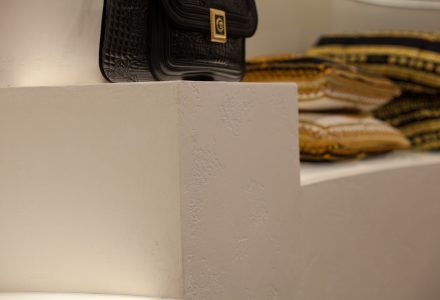
What makes a beautiful Lime plaster finish so unique? In my opinion its the architecture and interior design taste of the clients. With clients in Burnaby, Vancouver, White Rock and all over the Lower Mainland, Architecture and Interior design is always changing. Lime plaster is the perfect material of choice that follows. Think custom fireplaces, feature walls or even full interiors Lime plaster projects.

Does your master bedroom have Architecture with curves like these? Italian Lime plaster is just the thing to bring these walls to life.

Does your style scream for a Tuscan Venetian plaster like this house?

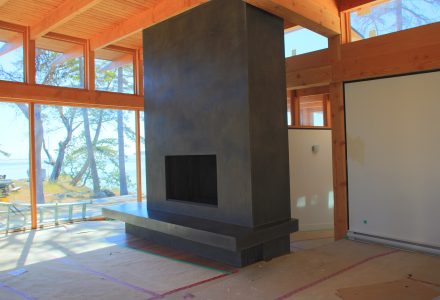
Possibly you have a fireplace that has been needing the recent uplift. Could you dream of a sleek fireplace in Tadelakt Lime plaster?

Lime plaster has been my choice of material for almost a decade now. Recently someone told me it takes 10,000 hours to become proficient at any trade whether it be carpentry, framing or even a stone mason, the time spent honing that skill will one day make you a tradesman (or tradeswoman).

Over the summer I have been fortunate to work on a project in an Old World Italian Design Tuscan Villa. Breaking into my crate of techniques from WoodGrainingGoldLeafingVenetian Plastering, Lime Painting and Stencilling.   I have been challenged in ways that excite my mind and creativity, opening a new chapter in my life and the world I love to call Italian Plastering.

Here are some photos from this recent journey, the project is still in progress.

WoodGraining base coat

WoodGraining complete

Fibre Crown is a foam moulding used to simulate stone and in most situations is painted with acrylic paints.

Here is a close up of the foam moulding

Lime Painted Fibre Crown Moulding To Simulate The Look Of LimeStone

Fibre crown molding Lime stone 2 before & After

Tadelakt being used as a distressed old-world finish is not the norm for this material. While my supplier were out of stock I was forced to use this amazing material on a Tuscan Villa in the depths of Langley, Britsih Columbia.

What a treat it has been to learn the advantages of this amazing material and also a client and builder giving me full expresion of my work and creativity.

This is the 1st home I have Venetian Plastered that has 5 Juilet ballconies in the main hall, with one of the most amazing fireplaces I have ever seen. (That to come in the next post)

Here are some pictures from the start of the project

Powder Room Plaster finish

The house is still under major construction and I will share more as I find more time, bare with me the end of the summer is a real busy one.

Thanks for stopping by

Cheers
Darrell Morrison

If you know me, you know I’m a busy guy. It’s work, work, work, these days, and when it’s not about work, it’s about time with my wife, my girl, and the pups.

Needless to say, like most of us, I seldom get to do the projects around the home that I dream of doing.

That all changed in the last month, because not only did I finally get to do a bit of home reno that my family gets to enjoy, but I also got to try something I’ve wanted to do for a really long time — a heavy-duty Italian venetian plaster treatment to a bathroom shower stall.

This work was done in our main-floor bathroom, which had been wanting TLC for a while.

Doing any project for the first time, especially when it’s a bathroom, can make it hard to estimate all the work involved, so getting a chance to explore the process on my own time was great.

It was a major project by the time I finished, as you can tell by the end results, but what did it take to get there?

Here’s how the Home Shower Venetian Plaster Project evolved, start to finish.

This ’70s bathroom came with tons of cedar, which all had to come down. Luckily, it was installed by someone who didn’t make much effort to do it right, so only a couple nails in each board ensured they popped right off. Removing the shoddy work made investing time in improving the room that much more satisfying.

The first thing I wanted to do was move the shower-head up by about two feet. No one wants to crouch for a shower.

Before now, I never had the need, or an opportunity, to work with copper. I decided I’d take a kick at the copper can instead of calling a plumber, and working with the pipes was easier than I expected. I might do the odd fix-it job here and there now, but I’d certainly never do my whole place.

Next, I installed plywood. I’m sure some of you building guys out there are wondering “why not concrete board instead of plywood?”

It’s a preference, really. I find plywood’s just easier to work with, and it comes in big old 4×8-foot sheets, making for less cutting in some situations, but, most importantly, I find plywood’s a big help when it comes to installing lath. (Shown later.)

Next up was installing the water-proof membrane. Obviously a quality project is needed for a shower, and I used a local company’s product, called, “SuperSeal” you can learn more about it here.

Continue Reading..

I remember my parents telling me their stories about how hard life was “back in the day,” when they’d have to slog through heavy snow, up snowy hills, all while braving the freezing weather. Now that I’m working in Banff, I can finally tell my daughter the same kinds of stories.

Except that my stories will involve my struggles this week — hauling some 2,650 pounds of Italian lime plaster up a snowy, icy hill, down some stairs to the lower level’s entrance, and all in chilly -14 degrees Celsius weather.

Yep, just another wintery day’s work in Banff, Alberta.

Laying down the base coat

There’s a reason they call short people “vertically challenged,” and my work in Venetian plaster and the constant need to do ceiling treatments means I’m proof of the “challenged” part.

Ladder, please!

I often need a little extra height, and that perfect height still means a world of work but a lot less pain!


Living and working in one of the mildest climates in Canada means I’ve never experienced the difficulties of building in high-altitude severe winter climate like that found here in Banff.

I’m enjoying seeing how different practices are needed for success here, and I’m super-impressed with how the builder deals with nature’s wrath, tenting exterior areas so the work on the home’s landscaping can continue throughout the season.


This is the exciting part, for me! Just last week, the main floor had barely any drywall hung. That was then and this is now! The build team has really pulled together, everyone’s always on the move, and they’re working as a team to get ‘er done. There’s a lot of good nature on the build site, with everyone being very friendly and communicating clearly, all things that are very important to me in a work environment.

It feels wrong to post without sharing another photo of the area. Here’s the town as we head to our lodgings after a day at the job site.

Banff is such a lovely place. I have so much more of it to experience while I’m here, and that’s really exciting. It’s not just a mountain town, it’s a winter wonderland, and it’s feeling like an epic journey’s just getting started. Thanks for following the experience!

Cheers,

Darrell Morrison

This Week’s Banff Trivia:


Geologists report that the Rocky Mountains that make up Banff National Park are 45 to 120 million years old. In just the national park alone, one can find more than 1,000 glaciers — but only if they wear really, really rugged hiking boots!

Now you’ll see I don’t exaggerate. I said this Tadelakt fireplace was massive? It was HUGE!

Stretching 16 feet across and with a towering peak of 11 feet, you can see why such a dominant feature made nailing the perfect colour the most important step in planning. But, hey, it’s always about “the perfect colour”.

Remember, I’ll always be happy to mix tints as often as it’s needed to make sure it’s a colour you’ll love living with well into the future.

Back to the massive fireplace: When you take a built-in entertainment centre/room feature and want to turn it into something bold and grand, while still adding value to your home, natural lime-based Venetian plaster is definitely the way to go. Remember that, it’s not just a cosmetic change — it’s adding value with beauty.

But, here, take a look for yourself.

“After”:

“Before”:

Here’s the soon-to-be Tadelakt fireplace. Mean, green… and wow! Could be a show-stopper if it’s finished right… but that’s why they hired me, because my company only does it “right”.

Our first step was building up the mantle for added size and drama, by using a 16-foot piece of 2×6 and some crown moulding. Et voila! There’s some beautiful architectural detail.

After finished beefing-up the mantle and the build was done, it was
time to figure out the posts for the bulk of the Tadelakt fireplace
application. This transformation really took it to the next level of
super-cool, don’t you think?

Look closely. Do you see both the bulk and pure “flow” those legs added? We felt it gave exactly the character needed to make this fireplace a feature to envy in an already-upscale neighbourhood.

Next came the real treat — doing the actual Tadelakt lime-plaster application. That’s when I get to feel like we’re putting icing on a cake. This, though, was a tricky cake.

You know me, I love a challenge. Personally, this profile was like nothing I had ever Venetian-plastered before. The detail, curves, and
difficulty reminded me of a lonely country road on a winter’s morning — a great pleasure to be on, but taking it slowly and carefully would
be essential, while knowing that patience would be rewarded with beauty.

Do you see how I used an orange mesh for tying the pieces together? This step is a massive pain, and really not a fun part of the project, but when it comes to a curved profile and the added degree of artistic difficulty that comes with it, that grief is worth the effort just for the extra years of architectural integrity it gives the project. It’s like your mom always told you, “Anything worth doing is worth doing right.” That’s how I operate, too.


Now the project is complete and the space has taken on a whole new look. It’s no longer a built-in piece of drywall, but a long-lasting element for the room, and a focus of the home that can be built upon for years. This fireplace will surely remain a strong selling point for as long as the home stands, because we built it to last.

I’m glad you popped in for a look at my recent work. Thanks for reading!

Cheers,
Darrell.

It’s a good thing you hire me to do finish and not videos, because this one took me a year to make! What can I tell you? I’ve had spaces to make beautiful, but I finally found some time to share this one with you.

I’m pretty proud of this Tadelakt fireplace I completed last summer, so I’m glad I’ve finally got the video to post for you, including closeups, so you really get a good look at my work.

So, you ask why Tadelakt lime plaster was my first choice for this project?

This is a good lesson in why the material’s such an important consideration. You need to know the end look you want and what combination of products to use to get there. It’s tricky, and it’s why you need artisans who know their stuff but also know the kind of use it’s going to get, so both look-appropriate and wear-appropriate products are used.

All I can tell you is, out of all the styles of Venetian plaster I keep in my arsenal, it’s Tadelakt lime that brings the smooth, silky, and finely-honed “stone” appearance that makes it MY number-one choice for restoring a fireplace.

Personally, I also think it takes the mother-of-pearl finish the best, since it’s all about the smoothness of the finish.

It’s also really tough, so, Tadelakt really rocks in high-traffic, high-use areas like the fireplace.

I hope the film gives you that feeling, too, and gives you a good look at the detail I’m so proud of.

Cheers

Darrell  Morrison

Recently, I finally got the tool I’ve been wanting to add to my company’s arsenal — a 12-colour carousel tinting machine.

You’re likely saying “A what?”

When I Say “Any Colour”, I mean It More Than Ever

For years, I’ve been creating custom colours. Many times, I’ve been unsuccessful because of technicalities, like not having proper colours available to me or a way to distribute them evenly or quickly among all the products I needed to mix to get the job done and done well.

Stuck working with these technicalities, a lot of my colours were found in one part of the colour spectrum — browns or tans, and even beiges now and then.

With the size of new lime-plaster interior projects and the new direction I’d like to take my Venetian plaster work in, I knew the time was right to get this tool that would make the difference in meeting my standards on a large scale.

As an example, I’m currently working on a 10,000 square-foot Intonachino lime-plaster interior. With so much surface to cover, the client is having a hard time choosing the perfect colour. We’re close, so they now only want slight shifts in shade and/or hue. (How are “shade” and “hue” different? Learn more by following this link.)

Picky? Not at all. Like me, they know job satisfaction is all about the details.

I’ve now taken great care to create 20 different colours for this project. That’s a bit of an extreme for any project, maybe, but you have to live with the colour long after I’m gone, and we need to get it right. I won’t get upset or rush you for a colour at the beginning of a project, because preparation and work can begin while we take the time to do the right things to help you come to a decision you literally can live with.

This tint machine makes my life easier and helps me live up to my dedication to getting you a a truly livable colour for your environment. Now, at any point in time, I can change a colour’s direction. You want a 25% lighter shade? Okay, not a problem. We don’t need a paint-shop pro or a chemist to guess it out. Let’s get that done ourselves — between you and me, and save ourselves a lot of headache and reduce wasted materials in the process.

Breaking It Down:

◦                                  Whatever your favourite material — Tadelakt, Intonachino, Carrara or Classic — I have full control over the colour and tint of the end-product.

◦                                  Your money gets saved because I’m not wasting materials or gambling on a factory’s ability to get those pallets of lime plaster tinted just the right way.

You want it lighter? Darker? I can change that on a dime now, so you get what you want when you want it. Hue by hue, shade by shade, we’ll nail the colour of your dreams.

The last few months, I’ve been working on a Tuscan lime plaster interior in a beautiful custom home tucked away in Burnaby.


I’ve gotta say, the architecture blows me away. It’s my first plaster project in the area, and the home definitely ranks in the top 5 fave homes I’ve worked on. With curved walls, dominant archways, stunning distressed-wood doors, what didn’t I love?

I was brought in to install a 4,000 square-foot Venetian Plaster effect. I’m nearing the 70% completion mark. Things will move along really quickly in the next few weeks, though.


Here’s a breakdown of what’s going on.


The materials of choice this time are Stucco Italiano and Intonachino lime plaster.

I choose to seal my Venetian plaster projects with penetrating sealer. This helps to repel moisture and oil. If you’re getting a great finish, shouldn’t it be protected for you to enjoy for decades? Yeah, I think so too.


Once the sealer dries, I’ll go over it with golden heavy-bodied glaze tinted to a light raw umber.


If I don’t do this overglazing step, the Tuscan plaster style looks too new and fresh — like the photo on the top left shows.

While I believe in sealing all my plaster, it’s really necessary if glazing Tuscan lime plaster. Why? It’s thirsty like you wouldn’t believe. If it’s not sealed before glazing, a catastrophe can happen. The raw umber glaze would stain the surface beyond repair — blotchy and horrible. The wall would need redoing from start to finish, and who wants that? I’ll get it right the first time.


This is also where being super-prepared before getting started means everything. If that glaze hits an unsealed wall next to the project, it could be a domino effect of colour catastrophes, so care always needs to be taken.


Check out these snapshots of some of last week’s great work. Catch you next time.

In recent weeks, I’ve been lucky enough to be working in a lovely Greco-Roman home in Burnaby, BC.


It’s an awesome home, clearly designed for entertaining guests.


Well, when I first got out to the jobsite, the drywall wasn’t even installed. I’m a visual guy, but, for me, it’s difficult to get a sense of a home with all those studs and joists running up and down and everywhere. But, after awhile, I figured the home out, and I’m glad the project’s moving along.


We’re into the process now. Here, I was commissioned to install a distressed lime plaster finish, using something called Intonachino (in-tone-a-kino).


It kind of looks like it has a slight tint of yellow, but when paired up with the floor, it presents as a sand-beige. When I finish the project off, I’ll glaze the plaster with raw umber, adding a little character and an old, aged sense to the walls.

CLICK IMAGES TO ZOOM


Contact

Office:: 604.628.7855 | Direct:: 604.779.4233 | 9am to 5pm Monday – Saturday

Name
Email
Message

Thank you! Message sent.
Error! Please re-check that all fields are complete.
©Copyright 2019 Decorative Paint & Plaster Concepts Inc.